Notes on the Roubo Bookstand
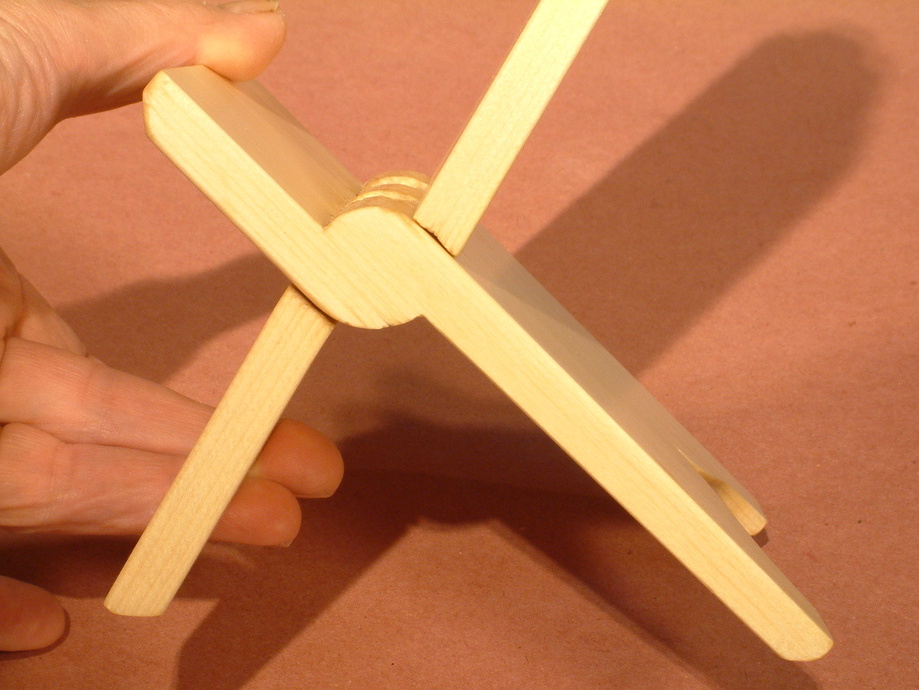
A Roubo Bookstand is made from a single piece of wood. It opens as pictured or folds flat. The design is actually much older than Andre Roubo (he wrote in the 1770s), it is a traditional form for supporting the family Quran. Searching the Internet for “Roubo Bookstand” will keep you busy for many hours.
Here is plate 331 from Roubo’s book.
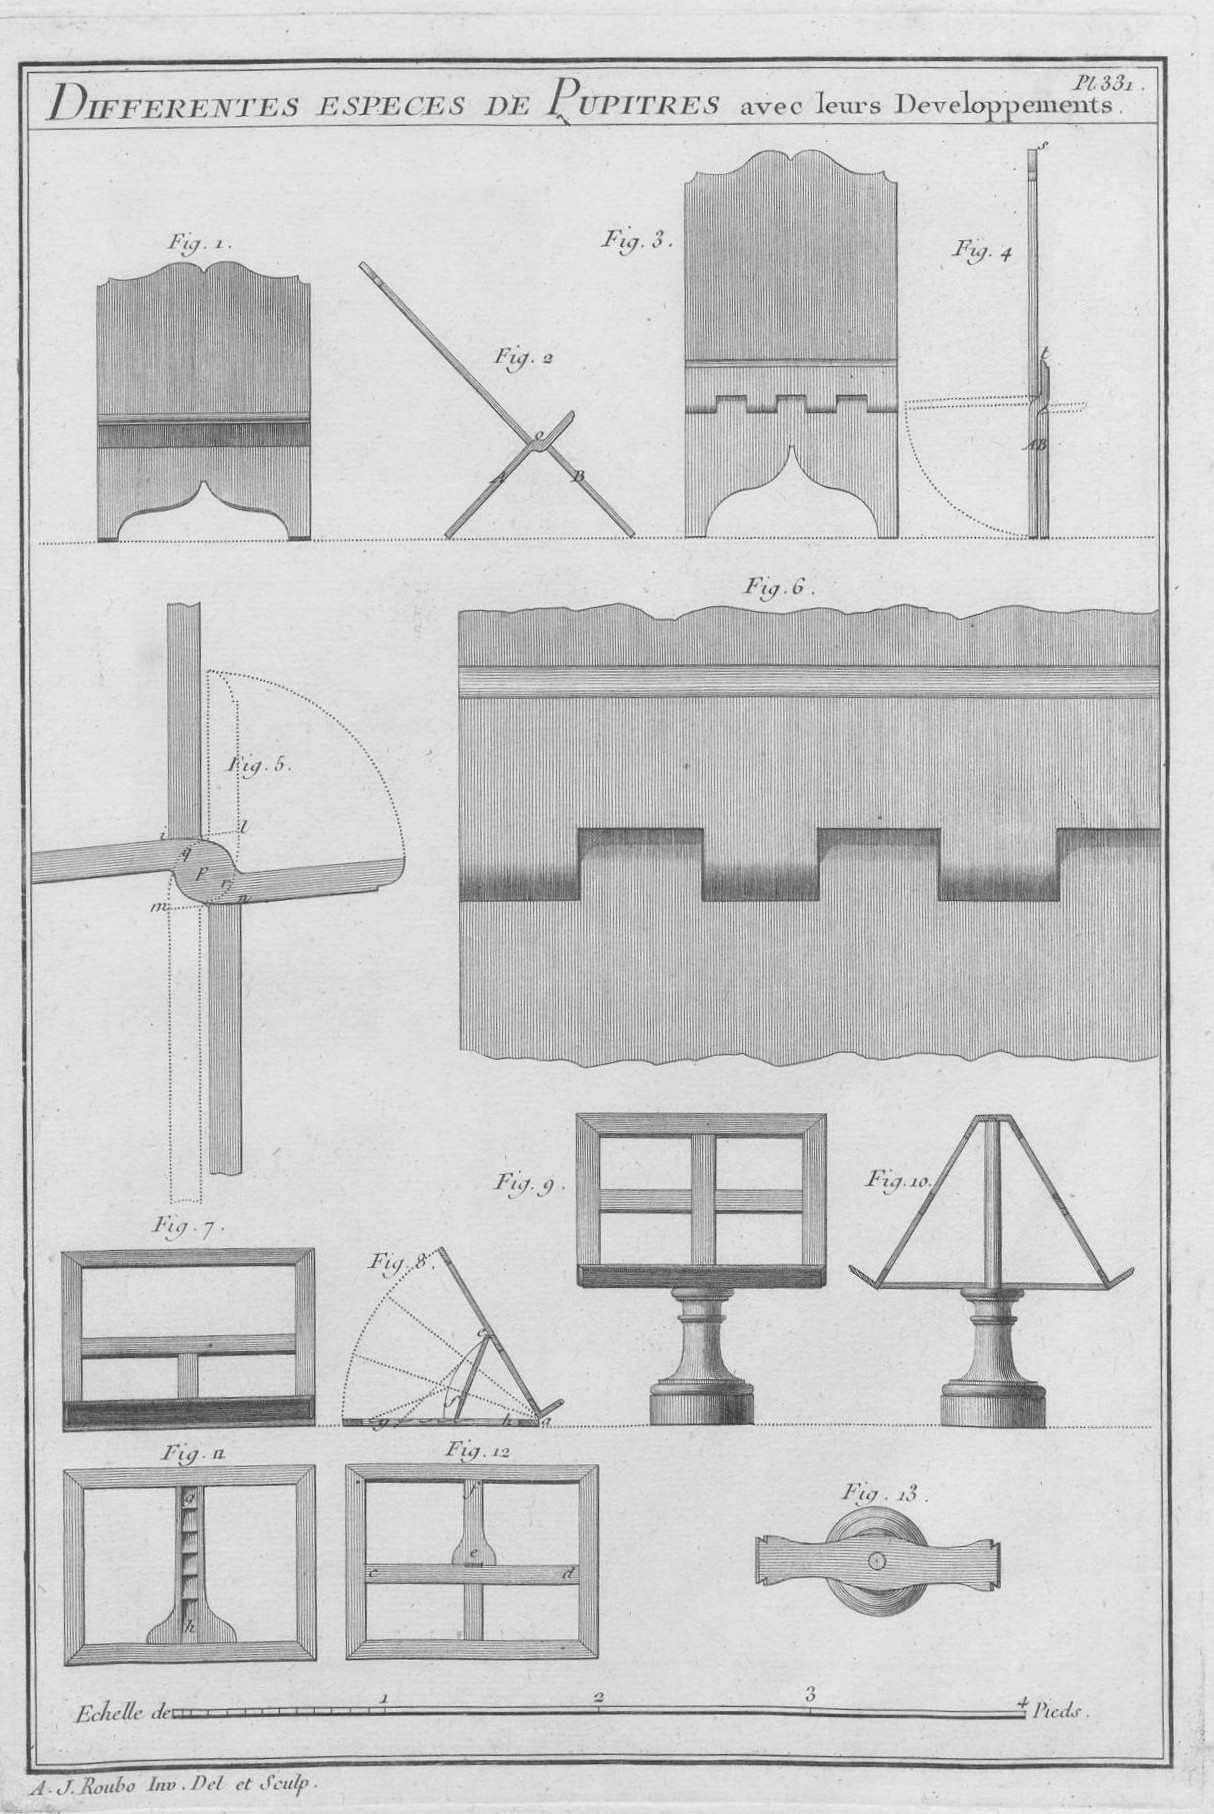
Plate 331 from “L’Art Du Menuisier”
The project is based on a “Woodwright’s Shop” episode from season 31, 2011-2012. Many thanks and credit go to Roy Underhill. You can view it here or here and you should to fully understand the material in this post as I won’t show steps here that duplicate Roys. There is a downloadable plan here which references an almost identical book stand in episode 2205 which aired in 2002. The PDF plan differs only from the more recent show only in the shape of the hinge pockets. A much earlier episode, 1986 Season 06 ep. 3 has an example similar to the plan, using straight cuts for the hinge pockets, also see Season 20, ep. 5. Woodwright’s DVDs are no longer available, but you can view them with the Popular Woodworking streaming service.
I’ve made this my hand tool project for 2014 and done several in soft wood for practice. In this web page I document methods and tools, especially where they differ from Roy’s.
I used construction grade 2x4s or 2x6s for practice pieces. The 2×6 version makes a fine Roubo IPad stand, the 2×4 size makes a dandy Roubo stand for a cell phone.
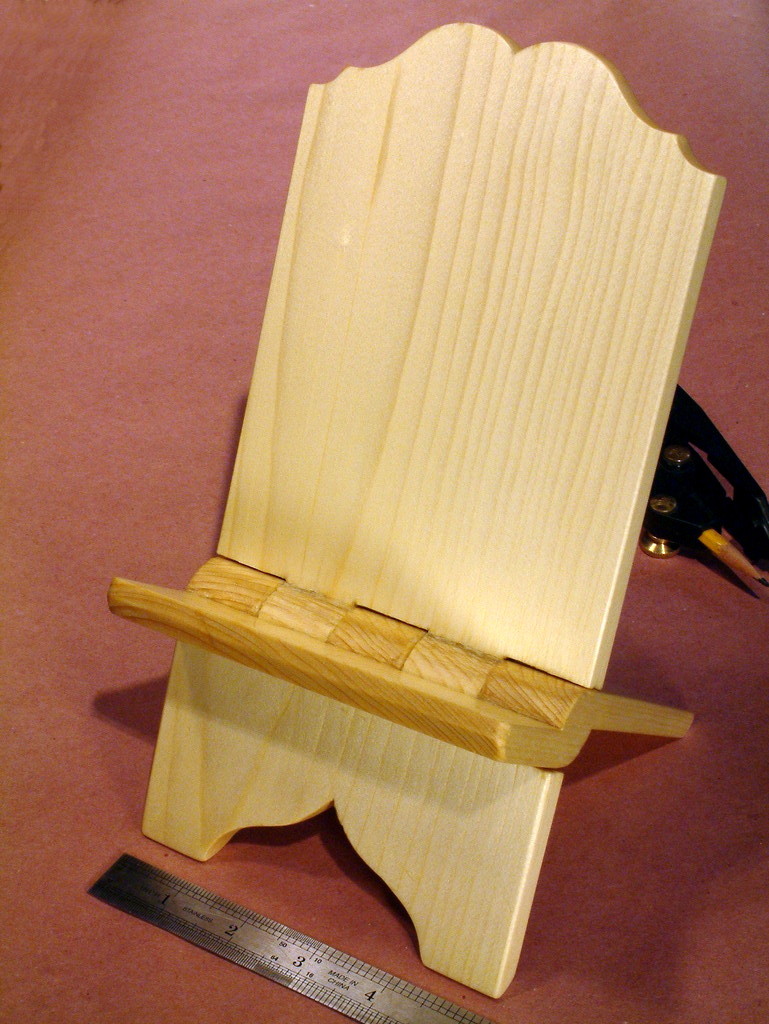
2×6 version Roubo Tablet Stand
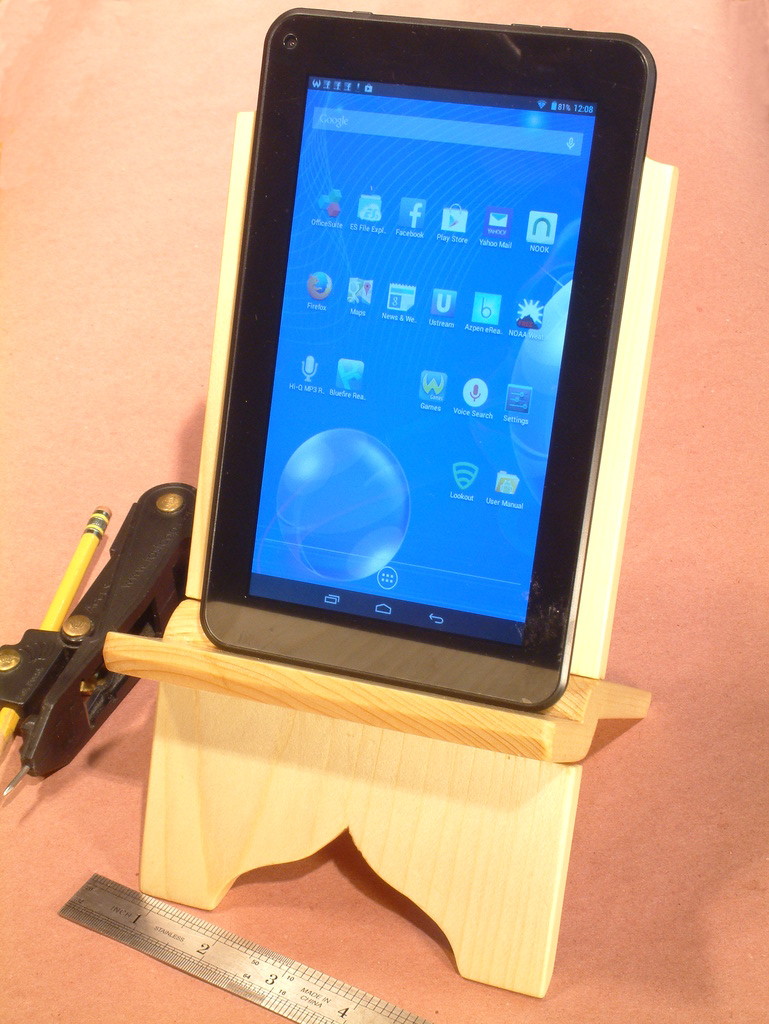
2×6 version with a 7 inch tablet in place
I use this stand every week watching “Ask an Engineer”.

2×6 Stand with Nine Inch Tablet
I don’t own a smart phone but I borrowed one for this photo of the 2×4 version.
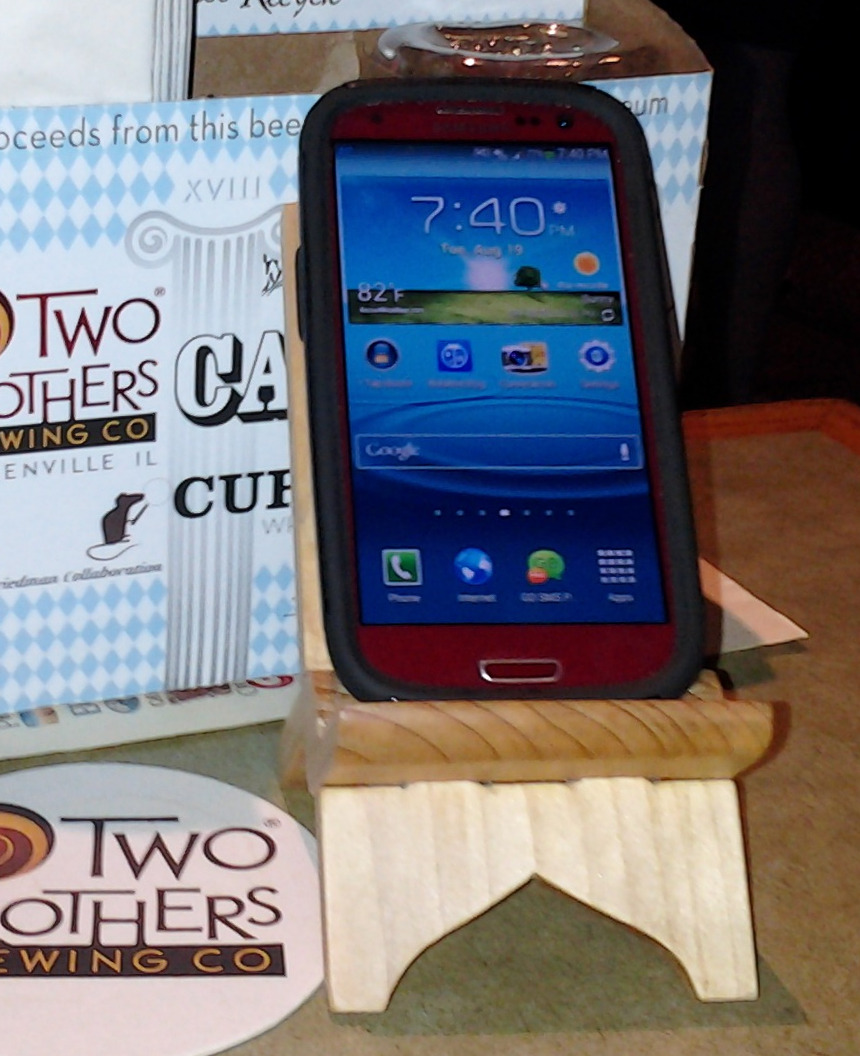
2×4 Roubo Cell Phone Stand
In the the next picture you can see two modifications I made to Roy’s plan. Both changes make the stand sit more upright making reading easier, and less likely to tip over. I shorten the front feet about 25%, and also inset the hinge pockets a bit, 3/32″ on this one inch thick stock. That keeps the stand from opening to a full 90 degrees.
2×6 Roubo Ipad version
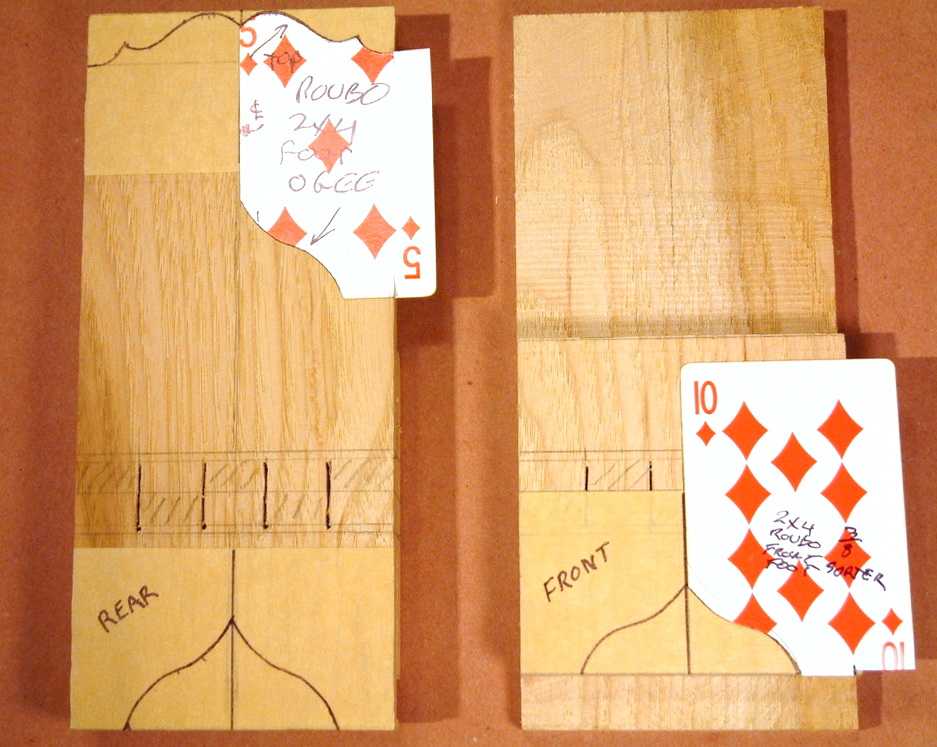
In this page, I’m making a pair of cell phone sized stands from a 14 inch piece of Red Oak.
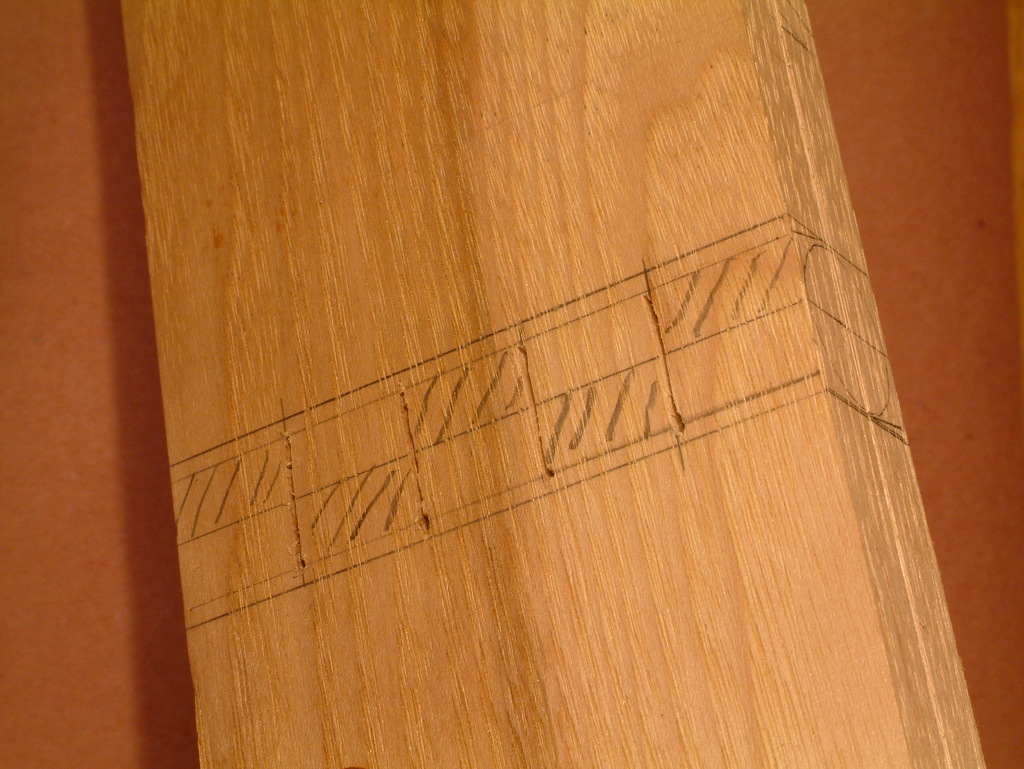
The hinge pocket inset requires angling the chisel when chopping out the pockets. I draw layout lines tangent to the hinge barrel circle just as Roy shows in his video, then add lines inset 3/32″ towards the center line. 1/16″ pilot holes for starting the saw cuts that define the hinge barrels get drilled along the inset line, not on the tangent line.
Hinge shoulder position is changed
Here I have drawn a line from the inset to the barrel tangent. The pocket must be chiseled out along this angle, about ten degrees.
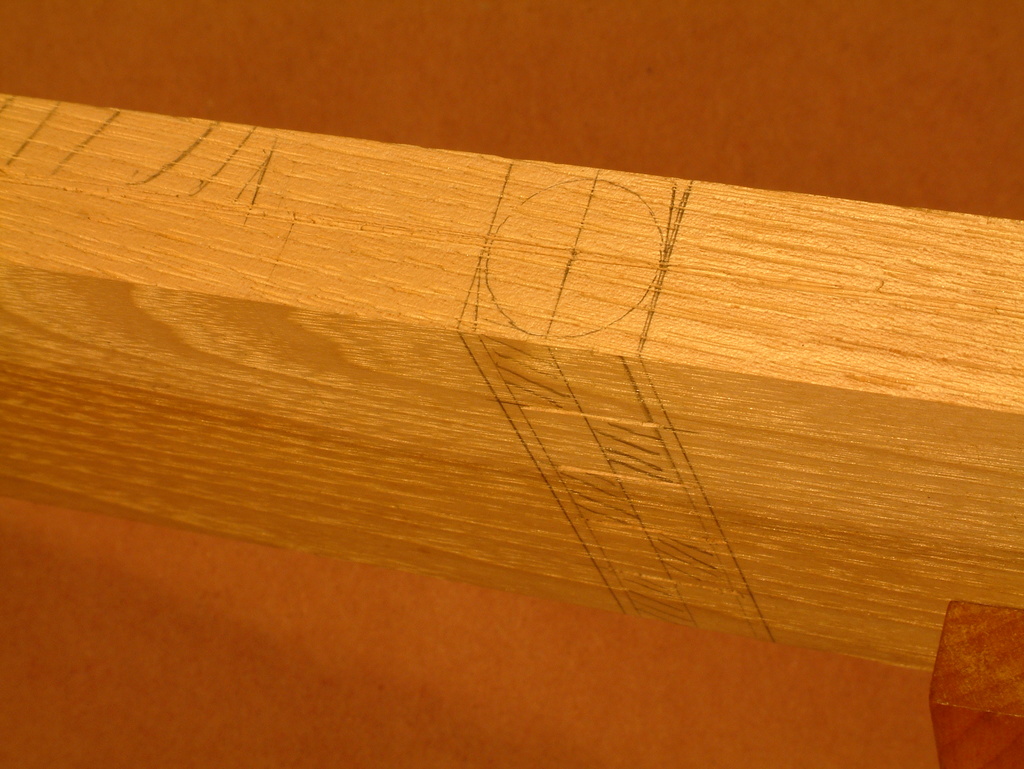
Angled Cut Line
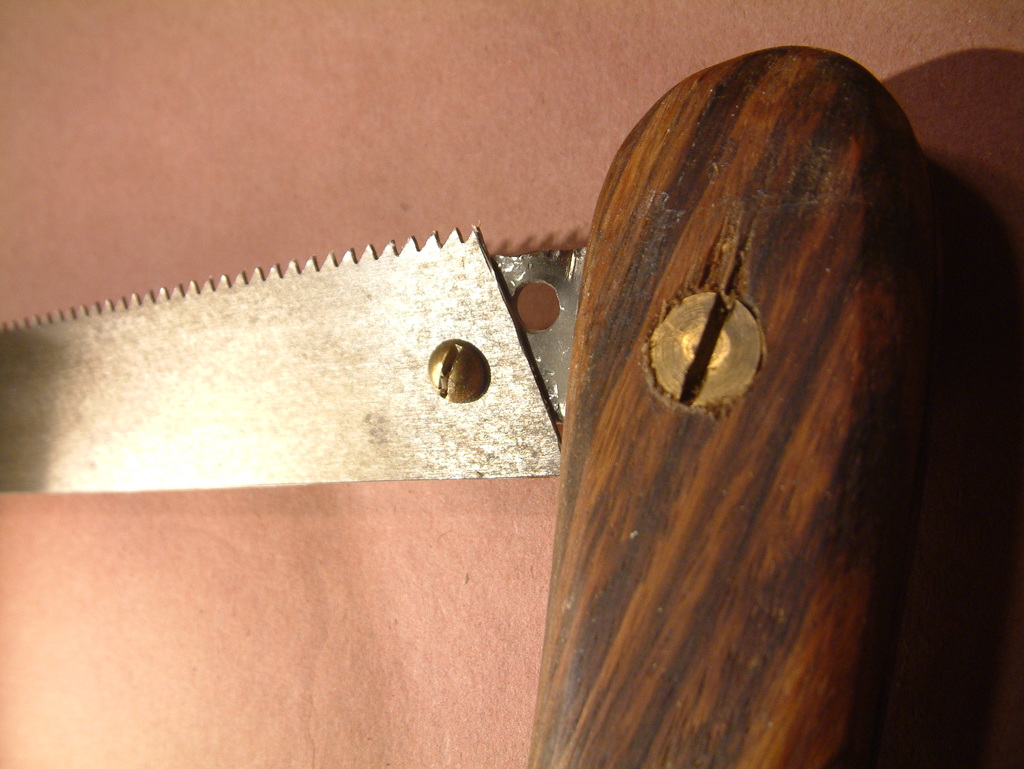
With the hinge layout complete, the next step is to saw down between the individual barrels. I tried Roy’s modified hack saw blade but got poor results so I acquired a jewelers fret saw. The problem is, these saws have a fairly narrow throat so can’t be used here in the normal way. I had to turn the blade 90 degrees so the fret saw could be held sideways. The nose fitting on this saw can be rotated a quarter turn, but the handle clamp is fixed. I found however, that I could clamp the blade in a sideways position. If you look closely below, the blade teeth are pointing towards the top of the photo, not out.
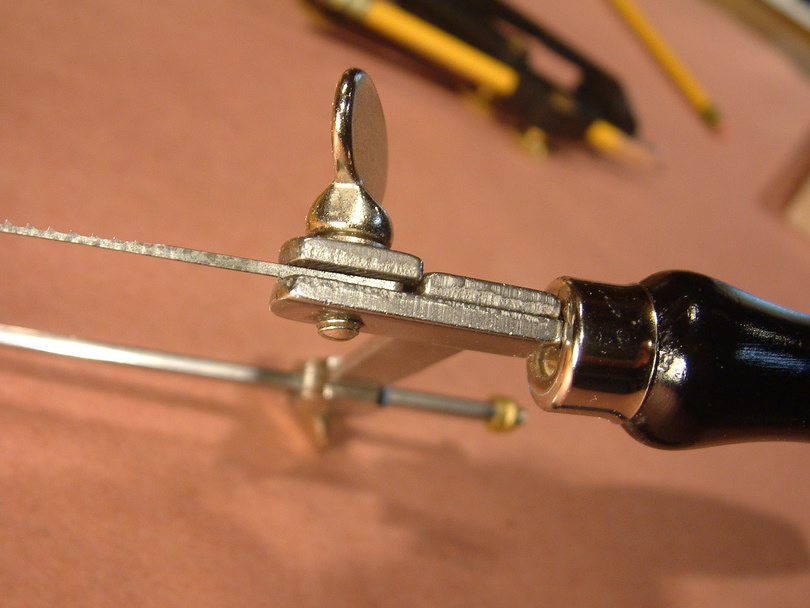
Modified fret saw
So now the fret saw can be used off the side of the work, though it still has to be carefully supported at both ends of the blade. There is enough range to cut hinges in the 2×4 or 2×6 version but I’ll have to get a bigger fret saw for larger stands.
In the photo below you can also see half inch deep cuts across the end grain to start the lengthwise ripping that ultimately separates the two parts of the stand. These initial cuts were done with a Tom Fidgen-esque kerfing plane.
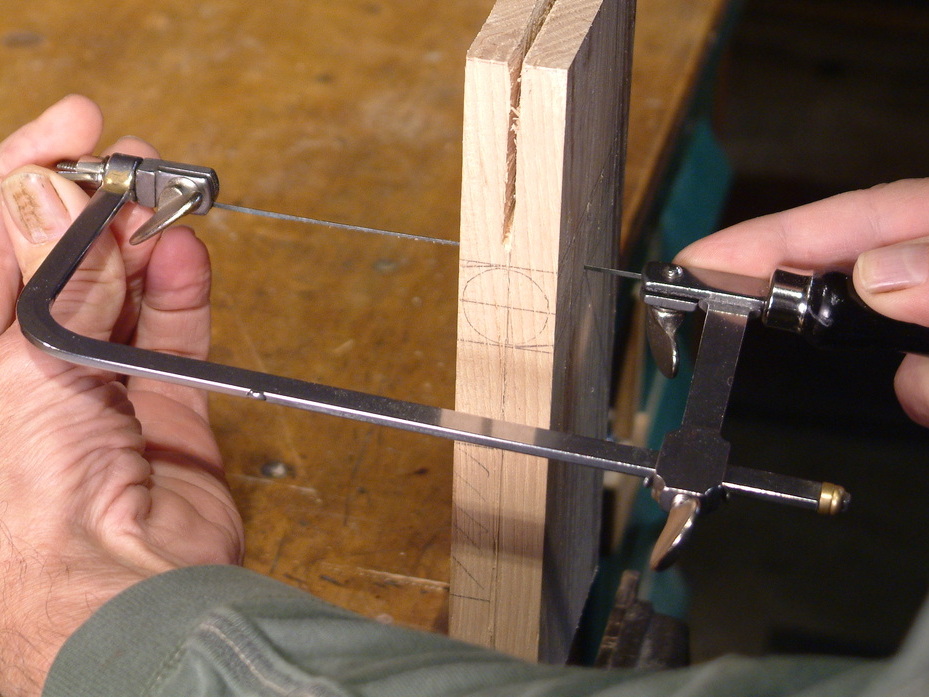
Cutting Hinge Pocket Slots
This Red Oak example is laid out two up. A pair of bookstands will be cut from a single long board, Roy mentions Roubo’s writing on this in the Woodwright’s episode – “to avoid the great loss of wood”. The two tall back sections are laid out overlapping and separated with a frame saw after removing part of the overlap.
My frame saw is a Craftsman originally intended as a wall decoration. I bid on it in a moment of weakness and seriously regretted when UPS dropped it off. The blade was coarse with way too much set. I have since changed to a nicer blade cut from an old rip saw, and made special blade supports to use with this project. At this stage I will saw down to about a half inch from the hinge layout, leaving enough wood to absorb the stress of chiseling hinge pockets.
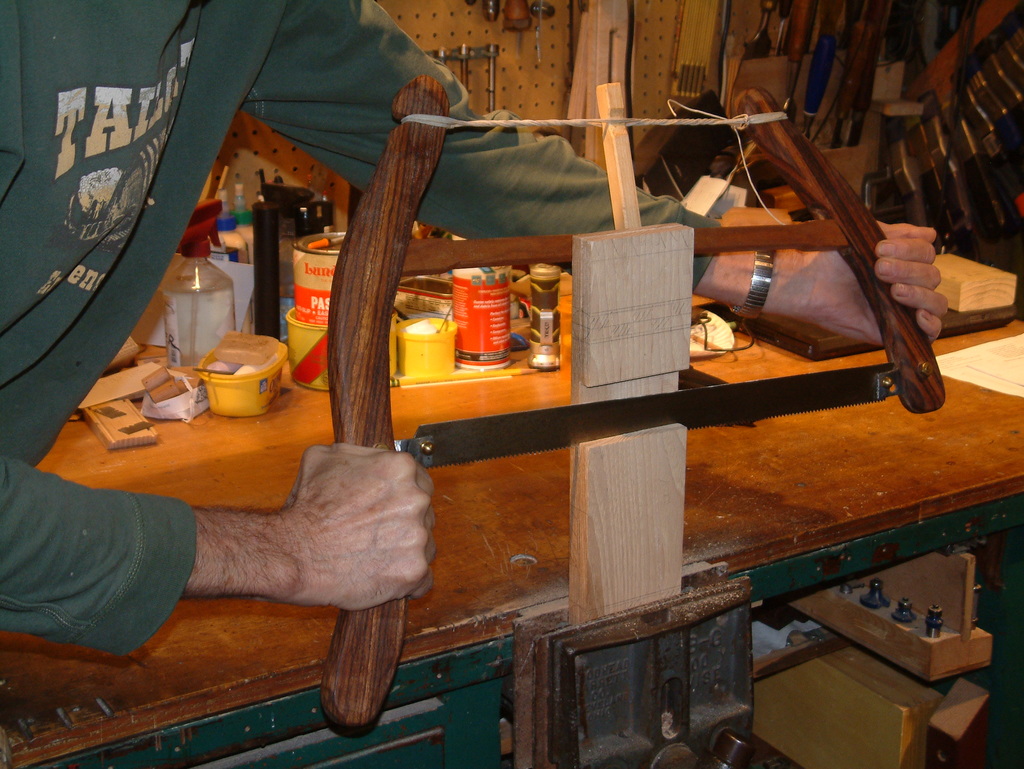
Frame Saw in Use
You can see in the photo above that the frame is held at an angle so it’s behind, not directly over the cut. I have made steel blade supports and twisted them 15 degrees. The modified saw works well and produces a fairly clean, straight kerf with not too much effort, even in this hard wood.
Angled Frame Saw Blade Bracket
The result after separating the pair of blanks and shortening the part that will form front legs.
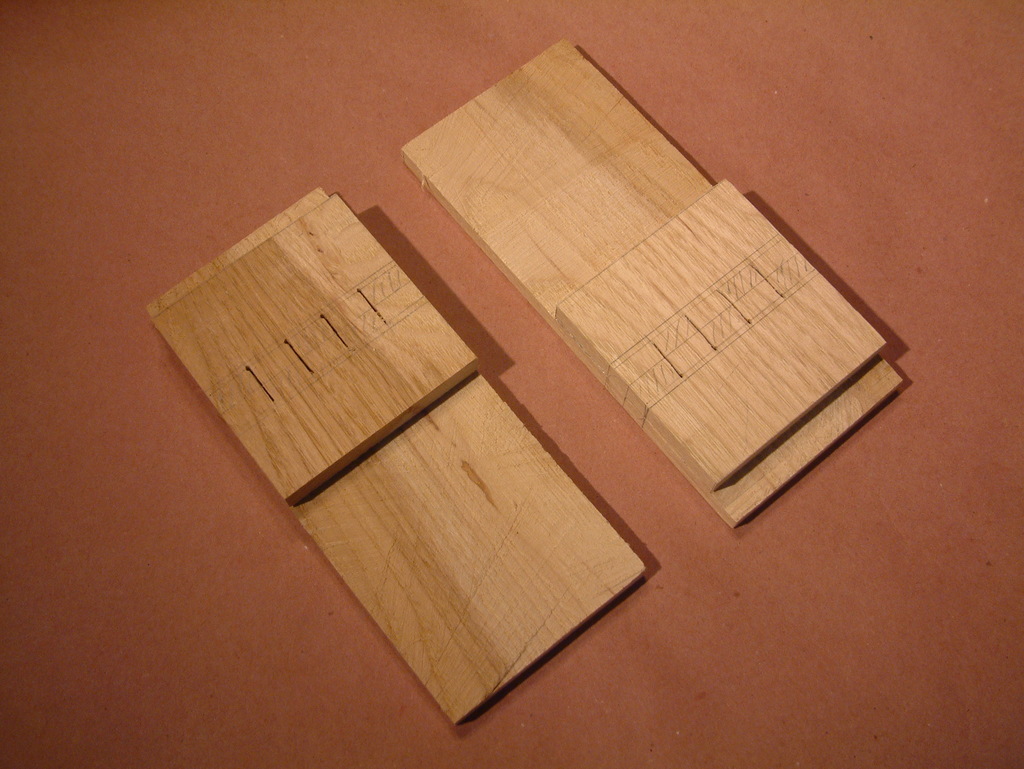
Two Roubo Stands
I chose to lay out the top and bottom curves at this time. This can wait until the stand is officially open but is easier while the blank is still a solid block. I use three templates, one for the top curve, one for the rear foot ogee, and a shallower ogee for the shortened front foot. The templates have half the desired curve. The vertical edge is aligned along the stands center line, half the curve drawn, then the template is flipped and the other half traced. Symmetry is assured. I added masking tape in this photo so I could draw with a Sharpie for the camera.
The top and rear leg profiles can be cut at this time with a coping saw but the front leg profile has to wait until the stand is fully open. I’ll wait and cut them when I need a break from chiseling.
Ogee layout
Chopping out the ten hinge pockets is done per Roy’s brute force method – firmer chisel, followed by paring chisel, followed by sharp knife. The inset hinge shoulders mean there is less room for the chisel but it can be done. In the next photo I am using a small bevel gauge to help guide the chisel to the necessary 10 degree angle.
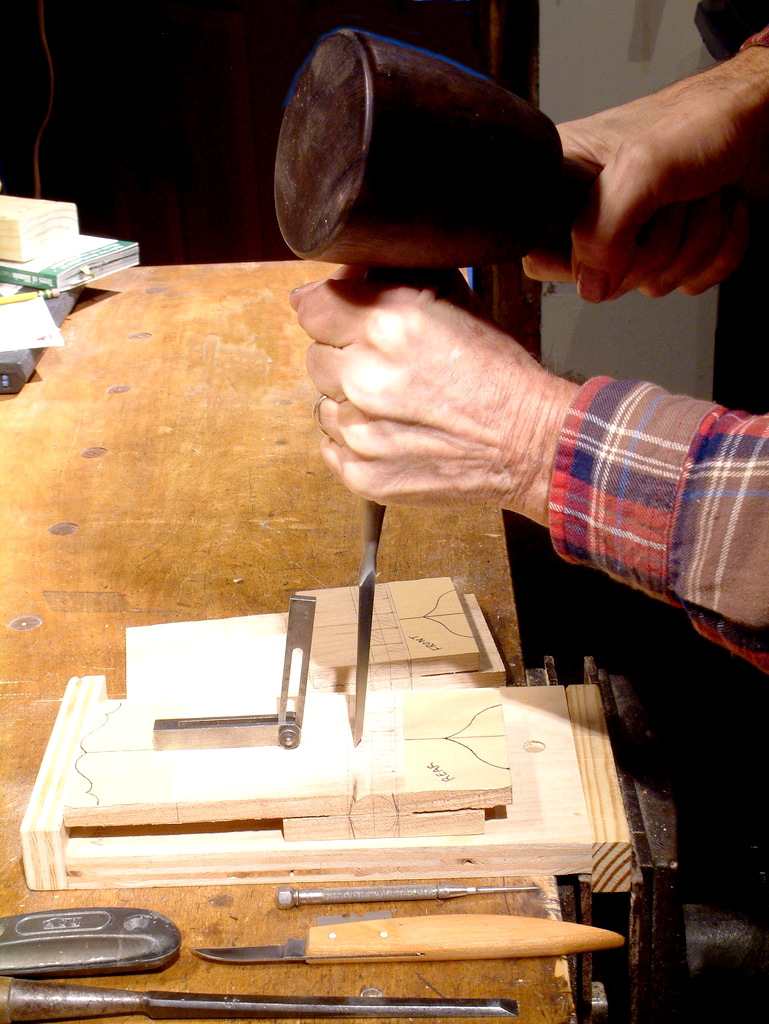
Chiseling hinge pockets
After all ten pockets are cut, the last half inch of the dividing wood must be removed. Roy called this “going flat” and he clamps the piece in an end vise. I only have an iron shoulder vise so that’s where it goes. I found clamping a pair of hardwood blocks at the hinge tangent line makes it easy to tell when to stop sawing.
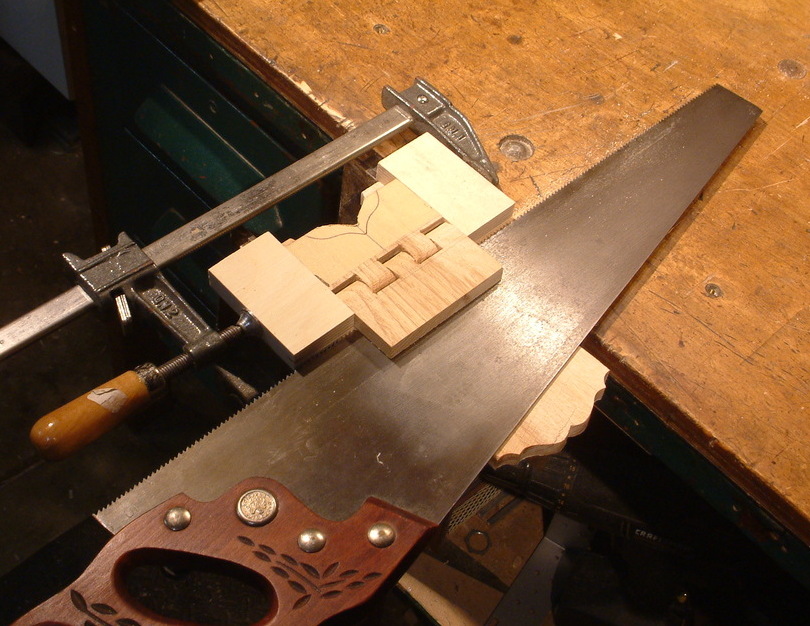
Sawing the Final Half Inch
After an hour and a half of tweaking, paring off spots that were binding it finally opens all the way. It helps to open it as far as it will go then hold the saw kerf up to a strong light and look into the hinge pockets. You can see places that are not completely separated or are binding. Don’t use force, the wood will splinter. Just work with it gently until both parts are moving independently.
In this photo you can see another Secret Weapon. Utility knife blade that have the corners cut off. These are tough enough to be pounded into the hinge pocket with a ball peen hammer.
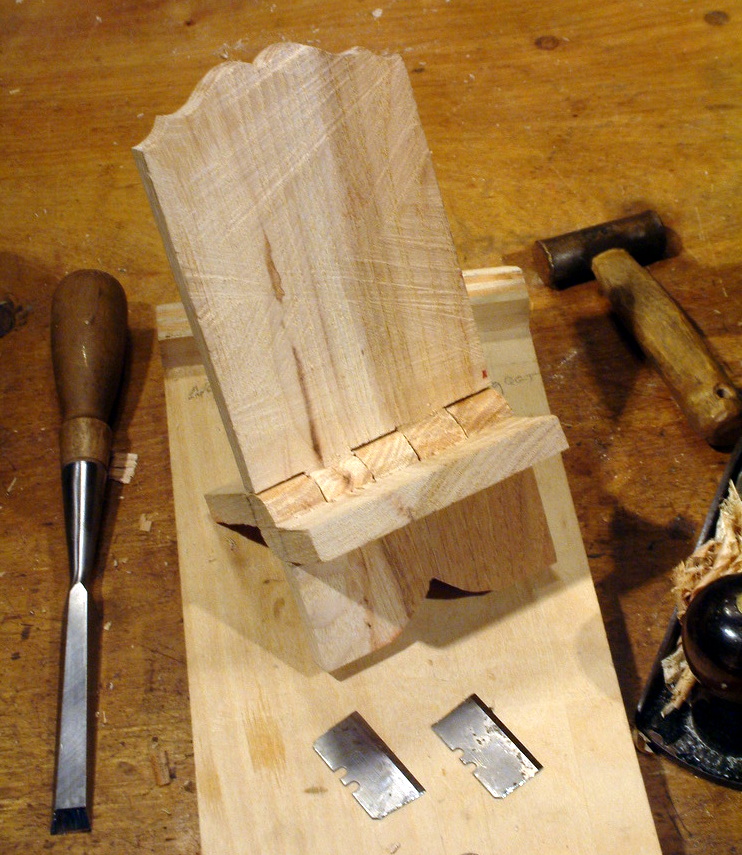
Finally Open
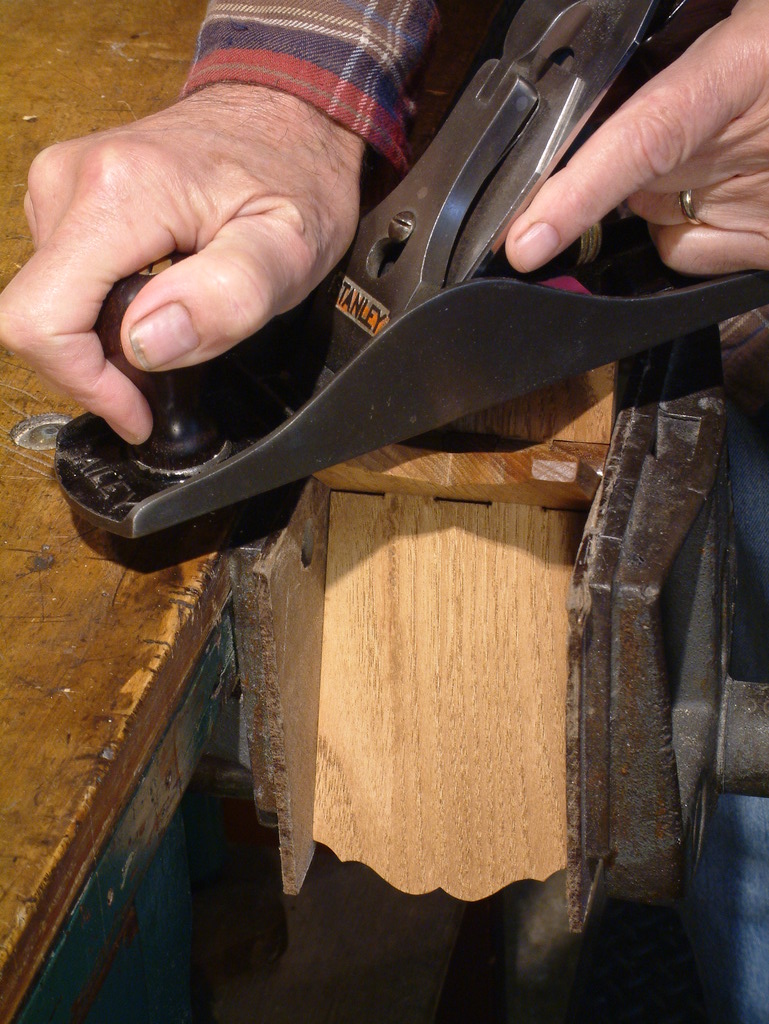
I’ve been cleaning up the saw marks with a low angle block plane or my trusty Stanley 5 1/4 followed by coarse sandpaper but on this hard Oak I used a card scraper after the plane. Because the stand doesn’t open to a full 90 degrees, planing these surfaces is hard on your knuckles.
When the stand is opened, it will sit on just the inside edges of the feet so its a good idea to bevel them. It’s also a chance to tune the feet to eliminate any wobble. My procedure is to clamp the stand upside down in the vise, then plane a few strokes on each corner with a slicing motion. The plane has to be long enough for the bed to rest on the opposite foot for reference, so I’m using the 5 1/4 in the next photo. Check the stand often on a flat surface to see if you’ve eliminated all wobble. For extra credit, tape a sheet of sandpaper to a flat surface and slide the stand across it a few times.
Beveling the Feet
I like to stain Oak projects with Minwax Golden Oak. That will be followed by three coats of Watco Natural applied with my sandpaper spit shine technique, then paste wax.
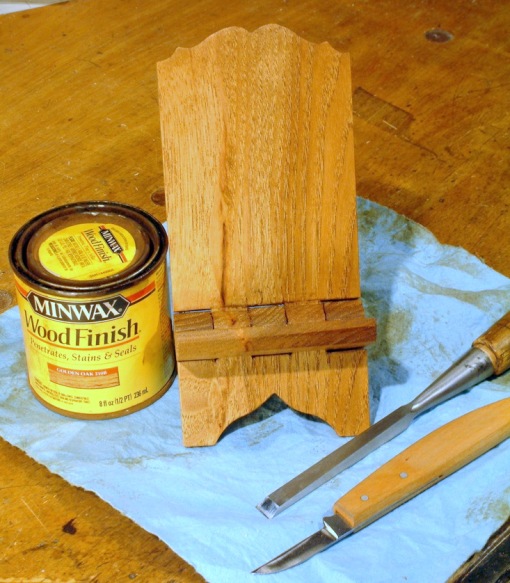
First Finish Stain
