Eleven Grooved Box Step by Step – Part 1: The First Three Grooves
The First Three Grooves
See the original “Woodwright’s Shop” video here.
I’ve made about a dozen of these now and will document the next batch here with photos. Most of the boxes I’ve made lately are in Cherry or Walnut and are pencil box size, 3″ x 8″. These next few will be larger, sized to hold 3″ x 5″ index cards.
The lumber for this project is leftover tongue and groove wainscoat paneling from my fathers house circa 1974. These were milled 5″ wide and 11/16″ thick. He never finished the basement so after 35 years, some of the stock was available. The Cherry had darked quite a bit and that had to be planed off to get an even color on both sides of the boards.
I cut 24 inch sections and resawed to produce a 3/8″ slab for the box sides, and a 3/16″ part for the top and bottom. Should be a great grain match. The first board was resawn by hand with a good old Disston rip saw but I did not like the results. It’s too hard to get a clean line and is a LOT of work. The other boards I resawed on a table saw. All were cleaned up and thicknessed with a Dewalt lunch box planer. That will be the last power tool used on this project, all hand tools after that. I suspect the lumber Roy uses in his classroom and the video comes from Lowe’s (it is 3 1/2″ wide) so I don’t feel bad about preparing the stock with power tools. Planer scallops and snipe were removed from all faces with a #4 smoothing plane.
The thin strips in the center of this photo were ripped from another piece of cherry. They will form the box lips.
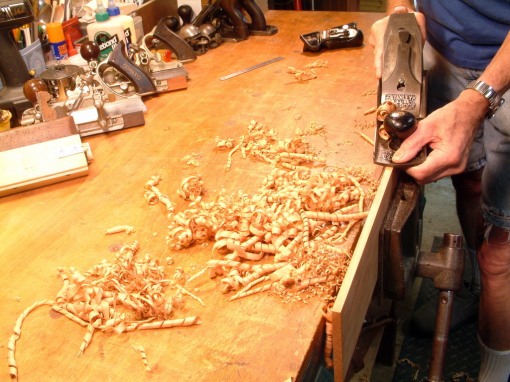
The boards still have parts of the tongue and groove machining which had to be removed. Here I’m using a 100 year old Stanley 606 to shave off the unwanted projection.
My planing discipline is not that great. I admire people like Roy and Bill Anderson who can unerringly carve off a perfect 90 degree edge free hand. I have to cheat. I have this little Stanley 95 edge plane that is made for truing up board edges. A couple of passes is all it takes.
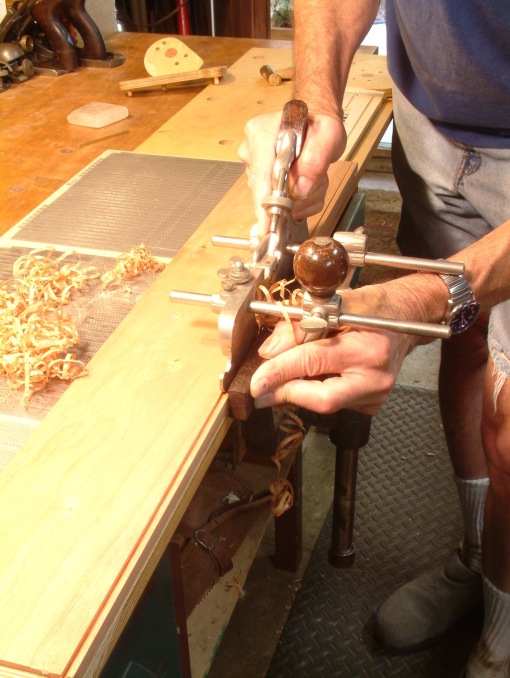
The workbench in my shop is a recycled office desk, is not very flat, and no end vise, so some time ago I made a flat plywood planing board. It has a cam arrangement to clamp the workpiece. For these thin pieces I have to raise the work up to clear the stops. I use old printed circuit board material under the workpiece. With the 3/8″ material clamped and aligned with the planing board edge, I can cut the first 1/8″ groove. This will hold the bottom of the box and is cut against the grain of the lumber. The Stanley 45 does not seem to mind grain direction much.
Groove number two is also 1/8″ and is made by flipping the workpiece 180 degrees, and plowing the other edge. This will hold the top of the box and is cut with the grain. I have switched to the short rods in this photo.
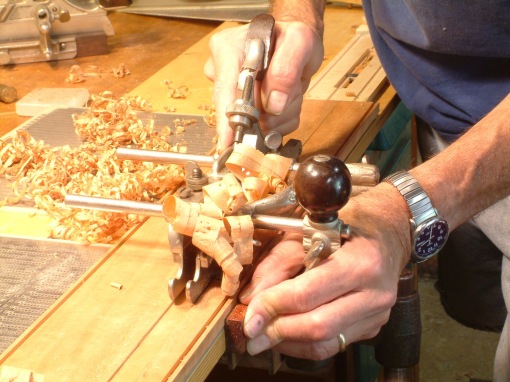
Groove number three is a wide 5/8″ and will ultimately hold the lip. I can cut this with the same board set up as groove #2 which is why groove 2 is set up with the grain. Groove 3 is spaced down far enough so 3×5 cards will stick out a bit from the box bottom.
All these grooves are started far end first and gradually worked back to the near end. This technique gives the front of the skates a channel to follow as the groove lengthens and deepens. To minimize skate dragging against the side of the groove, It’s important to check during set up, that the skates are parallel with each other and parallel to the fence. Waxing the skates with paraffin once or twice during the operation helps a lot.
For the lip groove, I’m using both depth stops as Roy does in the video, each set to 1/8″ depth. Here I’m checking groove depth with a 1/8″ brass block. A set of these gauge blocks is very handy.


No trackbacks yet.