Sliding Lid Pencil Boxes

“The Woodwright’s Shop”, Season 36, Episode 2 shows Roy Underhill’s method of quickly making many small wooden boxes for Christmas gifts. The show is not really about boxes, but about jigs to make them. I decided this would be a good project for the Dupage Woodworkers Club annual charity Christmas toy drive. Club members make a lot of toy cars which are most appropriate for boys. These boxes will appeal to girls or boys. I adapted the Woodwright’s ideas to mass produce boxes using a table saw, apologies to Roy, but my goal is to make 14 in a day.
DISCLAIMER:
Saws cut fingers as easily as wood. In many of these operations hands are very close to the blade. Pay attention, think through each cut before moving the wood, and turn the saw off to clear chips. I will not be responsible if you injure yourself.
Small boxes can get away with mitered corners simply glued. Three things are necessary for a box to come together perfectly:
-
Miter cuts must be perfectly square to the edges
-
Opposite sides must be exactly the same length
-
Mitered edges must be cut to a precise 45 degree angle
Given that standard pencils are 7 1/2 inches, the first boxes were designed for an inside dimension just under 8″. They are made from 1×3 stock from the local Home Center (really 3/4″ x 2 1/2″) resawn and planed to 5/16 thickness. I need 39 3/4 inches of stock to make one box and It’s possible to get fourteen out of three 8 foot boards. Dimensions are:
- Height: Full stock width 2 1/2″
- Front width: 2 7/8″
- Side length: 8 1/2″
- Top and bottom lid width: Full stock width 2 1/2″
- Top and bottom lid length: 8 1/8″
These dimensions were calculated to fit using 5/16″x2 1/2″ stock. See this paper for details.
The main tool is a table saw with a 3/32″ thin kerf blade to cut out the parts, and a standard 1/8″ thick blade to make the top and bottom grooves. I resaw the 3/4″ thick boards with the thin blade. You could of course use a band saw but I don’t have one. Finally a lunch box planer cleans and thicknesses the resulting 5/16 stock.
You also need a miter gauge, or better (and safer) a crosscut sled, equipped with a flip down stop like this Rockler part. I made a stop from two pieces of hardwood scrap, two quarter inch bolts, and a makeshift T track.
I carefully adjust the fence to 90 degrees from the bar using an engineers square to satisfy the first rule above.

This is the dedicated crosscut sled I fabricated. A piece of half inch MDF core plywood and two pieces of leftover oak flooring. Did not take long to make, the critical things are the rear fence has to be flat and exactly perpendicular to the saw kerf. I used 3/4 inch pine for the two runners. The sled is now the only thing I’m using to cut the box miters. It is much easier to control than the extended saw gauge. I use the saw mitre gauge only for the vertical lid cuts.

This is a closer view of the flip stop. Placing the board against the rigid stop satisfies the second condition above.

And this is with the stop flipped up.

You also need a spacer block so you don’t have to reposition the flip stop to cut the shorter end pieces after cutting a longer side piece. The length of the spacer block is the difference between the long side and the shorter end pieces, 5 5/8″.

Because it takes time to set up each operation, every piece of stock is handled in parallel. In other words, if you are making 14 boxes from three 1″x3″x8′ boards, do step 1 on all boards before moving to step 2, do step 2 on all pieces before setting up step 3, etc.
- all the 3/4″ boards are crosscut according to the cutlist
- all the boards are resawn to half thickness
- all boards planed to 5/16″
- cut four mitered sides for every box
- cut top and bottom plates for every box
- cut grooves in each side to receive top and bottom
- rabbit edges of each top and bottom plate
- slice the half inch handle portion off the front piece
At that point you should be ready for glue.
Here is a cut list for the project, also available as a PDF. It’s easier to resaw the 3/4″ stock if it is cut into shorter lengths.
Note: Drawings and files can be downloaded from Dropbox.

I do the resaw in three passes, raising the blade about a half inch each time, ripping both top and bottom edges. I first check the blade for exact squareness using a Wixey digital angle gauge and set up a feather board. If my saw had a bigger motor I could do this in fewer passes.
I always try to move my lunchbox planer to the driveway when thicknessing stock so I can clean up the mess with a leaf blower. Since these boxes are destined to be unfinished gifts for small children, it’s not necessary to do a perfect planing job but any snipe or defective spots should be marked to go to the inside surface. Actually, in this cold weather, I have been planing most of the resawn boards with hand planes. It goes quickly and warms me up.
Once the 5/16″ stock is ready, the first step is to mitre one end. The saw blade is tilted to 45 degrees measured with my digital Wixey (love that thing) to satisfy the third condition above, and raised through an aluminum insert for zero clearance. Note this is a left tilt saw.
Stock is positioned on the right side and aligned using the tilted fence kerf to cut the first bevel. The stop is lowered and adjusted for this set of boxes so the outside measurement to the blade is 8 1/2″.

Move the stock to the left side and make the second cut by holding it against the lowered flip stop. This completes the first long side.

Raise the stop, return the stock to the right side, and make a new initial bevel as before. The cutlist measurements are tight so it’s necessary to cut exactly on the previous bevel line.
For the second cut the spacer block is placed against the flip stop to create a 2 7/8″ end piece.

Repeat the above two operations to create another long side and another short end piece. Cutting out the four sides of a box takes only a couple of minutes once the initial setup is done.

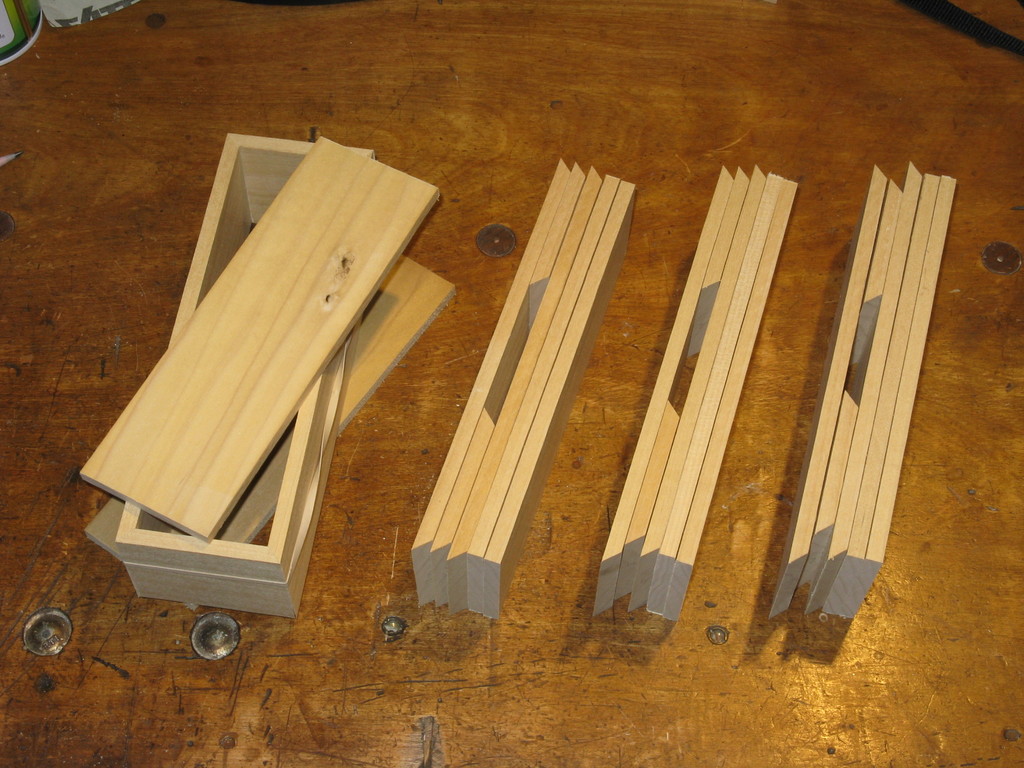
Cutting box sides sequentially from a single board lets the wood grain wrap around three of the four corners, a nice touch. To make that possible, the box has to be ultimately glued up in the same order as it was cut. Turn the pieces in order bevel side up and mark each beveled edge with it’s mate. If you make marks on the bevel near the center, they won’t show when the box is assembled. Use a dark Sharpie so you can see the dots through a layer of glue, (but not too dark, I found sometimes the Sharpie bleeds through to the outside face). In this photo, see a one dot corner and a two dot corner for box #5. Note how the grain flows through the three pieces.

Care in squaring the fence, setting the blade angle, and using a solid flip stop is rewarded with perfectly closed corner joints.

Finish the six box components by cutting out two plates for the top and bottom. Return the thin kerf blade to vertical, adjust the stop for an 8 1/8″ cut and make two pieces. That little bit is all that’s left over from one of the 40 inch boards.

Here are four box kits ready for grooving.
Next, set up the table saw to do eighth inch deep grooves at the top and bottom of each side piece. The same setup can be used to make eighth inch rabbits around the top and bottom plates. I use a 1/8″ brass setup bar to help set the saw to just over 1/8″ height and spaced 1/8″ from the fence. The blade in the photo is one side of a Freud dado stack. It makes a clean cut and has the correct width.

Roy’s video shows cutting the groove before slicing off the beveled side pieces. With the table saw it’s easier to do this after the sides are cut out.
Here I am grooving a long side using a push block.

Grooving the short side. Have to be extra careful where you put your fingers.

Now all four sides of each top and bottom plate get rabbited. You need an eighth inch tongue on each edge that makes a sliding fit in the groove around the box sides. It may take some fine adjusting of the spacing between saw fence and blade to get the fit just right. The plate should slide easily in the groove but not rattle around.
Hold the pieces vertically, pushing them across the saw blade. Cutting the tongue with a single eighth inch blade leaves a thin sliver of material on the inside edge of the top and bottom pieces. You can eliminate that by adding a second Dado blade on the saw arbor to make a kerf wide enough to remove all the wood. Or just break off the sliver.
Here I have added a tall fence to help guide the lid plates, and I’m using a push block for the end grain cuts. Even with the push block, the piece tends to wobble and cut unevenly, so I usually make two passes to make sure the rabbit is full depth. It’s best to do the short edges first, then the long edges.

Rabbiting the long side is straight forward. Again, fingers are close to the blade so extra care is needed.

The final milling step is to mark and slice one of the ends off a half inch down. I do this in an old fashioned wooden miter box with a saw that makes a fairly thin kerf. Pick the end that has the grain wrapping around both sides, this should be the end piece with one dot and two dots. You can clamp a stop block inside the miter box to speed things up if there are many boxes to cut.

Here is a completed set of pencil box components.

Finally the glue up which takes more time than cutting out the parts. Use a long open time adhesive like Liquid Hide Glue or Titebond III. I apply with an acid brush that has half it’s bristles clipped off to make it stiffer.
Here’s all my gluing tools. Bottle cap to hold a puddle of Titebond or LHG, wood stick wrapped with damp towel to clean grooves, cut down acid brush, burnisher to close corners, thin snap knife to cut lid handle free if it’s gotten stuck from squeeze out. The tools are sitting in a two sided tray I use to hold the box while assembling the parts.

Roy says to rubber band the parts so I made Red Neck glue clamps from something I have a lot of, punctured bicycle inner tubes. Just slit a length of tube top and bottom. They will stretch about 25% so make the slit an inch or so shorter than the box. It helps if you use the two sided tray to corral the box parts while you’re stretching the rubber over the outside.
A 45 degree miter will be half end grain. To get good adhesion, I paint glue on the bevels in two stages, I give each a first coat to fill the wood pores, then after a minute, another coat to do the joining. Try not to get glue in the corners of the eighth inch grooves, it will stick the lid plates in place and you don’t want that. Make a groove cleaning tool by folding a damp paper shop towel around the end of a putty knife. Do NOT apply glue to the bevel area at the box front where the half inch handle will go.
Put the box together by inserting the top and bottom plates in the two long side pieces first (watching those Sharpie dots), then press on the end pieces. The half inch handle is not glued at this time but do put it in place to help shape the rest of the box. Apply two Red Neck rubber band clamps, then fuss the side corners to get good miter alignment. Also check that the miter joints are aligned vertically so the top and bottom edges are all in the same plane. It doesn’t take much of a vertical mis alignment to make the sliding lid hard to seat. Finally check with a small square to see if the corners are 90 degrees.
Allow a few minutes for the glue to take hold, then pull the half inch handle off. Slide the top plate out. If it won’t budge, you have squeeze out on the back corners. Get a pair of pliers and wiggle the lid until it lets go. Now apply glue to the end of the lid that will receive the handle. Press the handle on to the end of the top plate, centering it on the plate and clean up any squeeze out on the bevels. Place one or two thicknesses of paper towel in the groove at the rear of the box top. This will force the lid plate into the handle groove. Push plate and handle back into the box against the paper towel, making sure the handle seats properly against the box sides. Slide the rubber band up over the handle.

Remove the Red Neck clamps the next morning, sand off any glue squeeze out, and lightly break sharp corners and edges with fine sandpaper. If there are any gaps in the miters, you may be able to close them by burnishing the two edges. The lid should slide smoothly. If it doesn’t, tune with sandpaper or a shoulder plane. For extra credit, plane the top and bottom edges flat. I use a 5 1//4 for this, the bed is long enough to use the opposite side of the box as a reference surface.

This has been a very satisfying project. Thanks to Roy Underhill for the inspiration. Here is the first crop in Poplar and Pine from Menards cut off bin.
Update 12/26/16
I had a few of the lids stick hard due to squeeze out in the back corners. Had to pull them out with pliers which runs the risk of damaging the wood. Now I’m nipping about 1/3 of each corner off with a chisel which gives squeeze out a place to go. I don’t nip the front corners of the top lid where it will be fitted to the handle piece.

Update 2/1/17
I typed up the page of arithmetic for sizing the box parts. Also made a spread sheet to do the calculations. All this and more is in this zip archive.
Update 2/11/2017
Trying an alternate design. These 4″ x 4″ x 4″ cubes are each made from a 24 inch piece of 4″ by 5/16″ stock which was ripped and resawn from a 1×10. Since the sides are square, I don’t need a spacer. Also learning more about Titebond Liquid Hide Glue, you do need to paint on two coats or the joint will be weak. And I’ve found that a small amount of warp is tolerable, because cutting the stock into short pieces means the warp in each piece is small. Warp can complicate resawing though, and if the board is cupped, you will have trouble with the glueup. A cupped board will not allow an accurate miter unless it’s forced down flat on the crosscut sled.
I made these 12 in one afternoon, glueups were done the following morning in the house where it’s warmer. I cut up my last bicycle inner tube to make shorter redneck clamps, using a paper punch to make a hole at the ends of each slit which should reduce strain at that point.

Update 2/20/2017
Revised some photos and text to emphasize use of a crosscut sled. It really does work better.
Update 4/3/2017
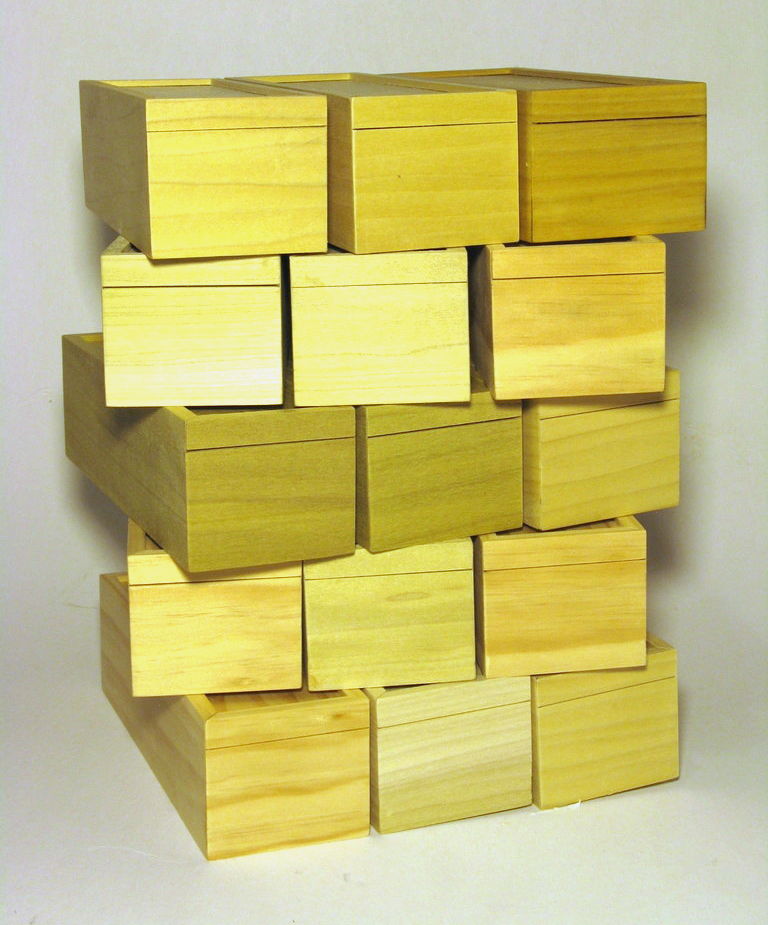
Nineteen pencil box sized “kits”. This batch was made from steeply discounted lumber and will bring my count to 110 boxes. I think that’s enough, I’m running out of places to put them.When I go through the production process I line up all the box parts on the bench to keep them together. After the last operation each is rubber banded into a package ready for glue. It’s still too cold to work liquid hide glue in my garage so these will be finished in the house.

And here are the 19 pencil boxes assembled, sanded and ready to go.

Also built several mongrels out of scrap. Making a box from bits of different boards has it’s own set of problems. I’m keeping these two and applying three coats of Watco oil.

Update 5/13/2017
I can’t stop making these things. Over 130 now. This batch is mostly mongrels, made from scraps but the four cubes on the right came from a single 24 inch 1×10 from Menards’ cut-off pile. The board was was $1.75 so less than 50 cents per box. Two Cherry cubes on the right have a center divider, both lids slide open. I’m keeping and finishing that nice grained Yellow Pine bottom center, and some of the Cherry boxes.

Update 11/18/2017
I’m presenting my methods to the Dupage County Woodworkers Club next week and since I can’t fit a table saw into my car, have created a slide show.
It is downloadable from dropbox at https://www.dropbox.com/s/c67c4xhlw3bata7/SlidingLidBoxes.zip
The miter sled is upgraded to a real TTrack and there is a different setup for making the grooves. The calculations are now done with a spreadsheet. The most recent version of the spreadsheet is https://www.dropbox.com/s/xdry4hyrbqg95a8/TriangleBoxes.zip?dl=0. It has sections added for hexagonal and triangular boxes.
Update 05/17/2018
The spring 2018 episode 35 video from Highland Woodworking, about 22 minutes in, shows Doug Stowe creating mitered corner boxes using a crosscut sled and spacer block in a manner similar to mine. His method does not require a flip stop though.
