How To Sharpen A Router Plane Blade
If you don’t know what a router plane is, you probably don’t need one.
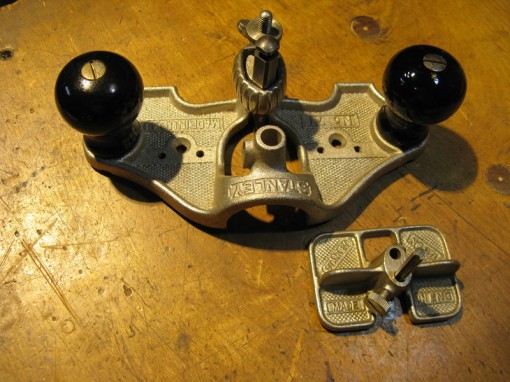
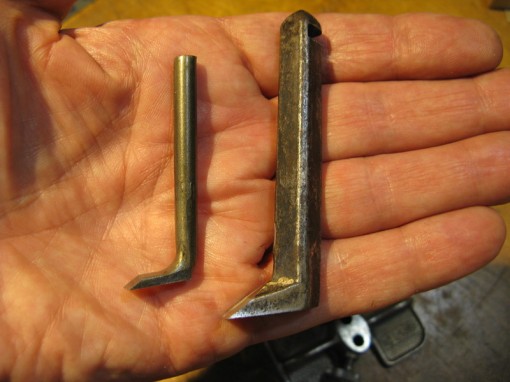
I have a couple of Stanley 71 router planes. The cutters are difficult to sharpen because the bevel is blocked by the shaft that connects the foot with the plane. Last weekend, at a Midwest Tool Collectors show, I acquired a Stanley 271 which is similar to the 71 but only about a third of the size.
The small cutter in the 271 is even more difficult to sharpen that a 71 blade and this one had significant rust pitting to grind out.
The foot (business end) bottom side of these cutters is flat and ground at an angle to the plane base to provide a relief area behind the cutting edge. Flat surfaces can be ground and polished on stones in the conventional manner, I have a coarse diamond plate and with sufficient elbow grease was able to flatten and remove all rust pitting on the bottom of the 271 cutter. That little guy is hard steel!
But the bevel did not yield as easily. An internet search showed people holding the cutters upside down with the bevel on the edge of a stone. I could not hold the small cutter at a consistent angle and I was rounding over the bevel, a no-no on a plane blade. So I did what any red blooded woodworker would do. I took a nap. When I woke up I had an idea. I have a saw sharpening jig that combines a saw vise with a flat reference plate which stabilizes the triangular file. If I could create a similar reference plate parallel to the router plane blade bevel, I could use that to guide a diamond file. And this method would work just as well on a Stanley 71 cutter.
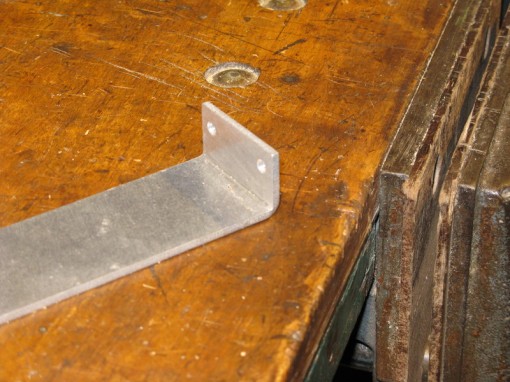
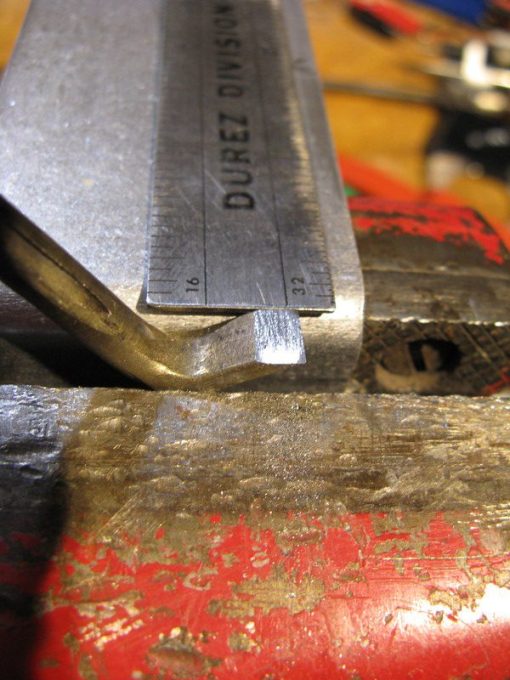
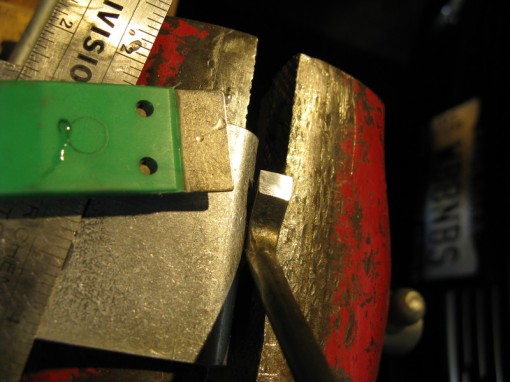
In the junk pile I found a bit of aluminum bent at a 90 degree angle. It probably was a rack spacer in a previous life. This would do as a reference.
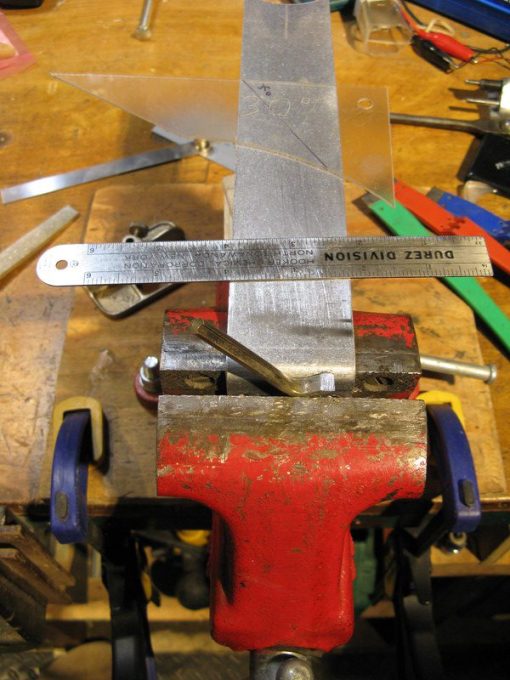
Sandwiching the cutter between the machinists vise jaw and the reference surface was easy. I propped up the back end of the reference plate with wood blocks.
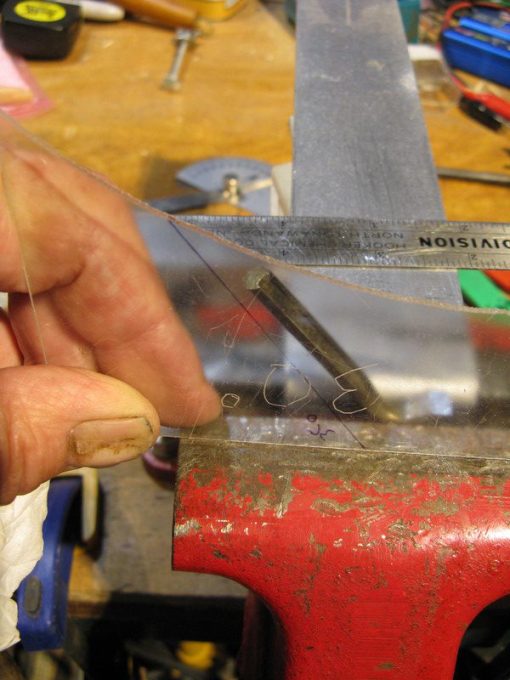
Now to align the surface of the bevel to the reference surface. The bevel angle on the cutter is thirty degrees. To that must be added the six degrees of the flat bottom relief angle. So the bevel is thirty six degrees from the shaft axis. I marked a 36 degree line on a plastic template and eyeballed the shaft angle.
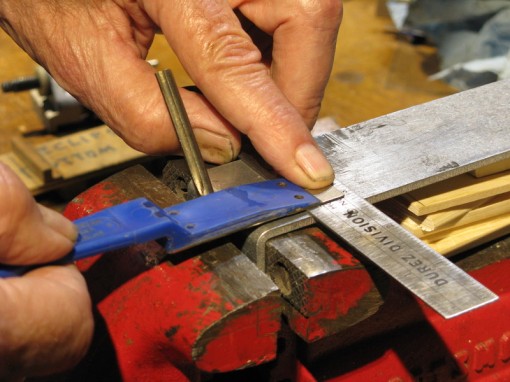
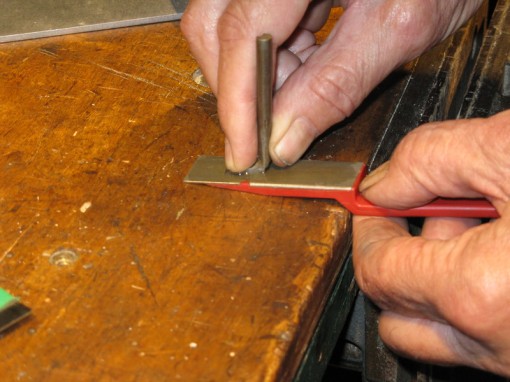
Next, the height of the bevel above the reference surface has to be set. I am using a ruler to support the far end of the diamond file so the bevel surface must be exactly one ruler thickness above the reference.
After fussing back and forth checking the shaft angle and the bevel face altitude several times, I was ready to grind. A drop of oil went on the reference plate so the ruler would slide easily. Then hold the ruler with two fingers and press the diamond paddle tight to the ruler with another finger then slide the whole thing down the surface and back. It was easier than it sounds. I actually started with a much coarser diamond file just to get the bevel initially flat and rust free.
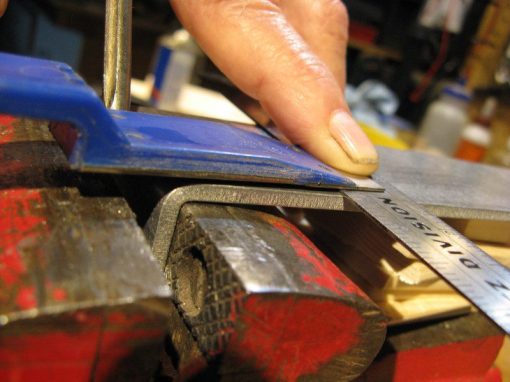
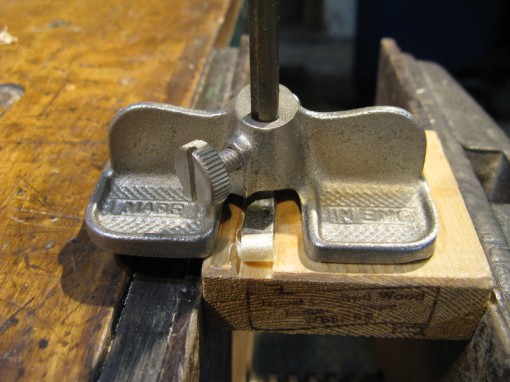
This photo shows how raising the cutter bevel to the proper height makes the paddle parallel to the reference surface.
Did not take long at all to get through the four diamond grits I have available and now a nice even shine on the cutter bevel. No more dubbed over.
I touched up the flat bottom of the cutter to polish and remove any burr.
And it works! Many times I could have used one of these little routers and now I own one. Thanks MWTCA.
Did you try this jig out on the big boy router iron? Interesting, because I’m one of the sharpen it off the side of the stone guys.
Great Idea! Thanks for sharing I too have just invested in one of those lil guys too. just came in the mail today!
Have not tried a big iron yet but if it will clamp up square in the vise it should work.
That looks like hard work. Have a look at my website for a system I developed that will produce sharp edges quickly and easily. The basis of this is a hollow grind on the blade – yes, a router plane blade – and my article shows you how to achieve this …
http://www.inthewoodshop.com/WoodworkTechniques/SharpeningRouterPlaneBlades.html
[img]http://www.inthewoodshop.com/WoodworkTechniques/SharpeningRouterPlaneBlades_html_m1936bcd6.jpg[/img]
Regards from Perth
Derek
I did in fact, do exactly the same thing when I got my first 71. It speeds up the process quite a bit. Did not think it was worth the trouble with the small 271 cutter.
My apology. I thought I was posting on Wood Talk (your link brought me here)
Derek