The Shed Project
This post is not really woodworking more like carpentry. Sheds are legal in this town as long as they are not on a permanent foundation and are at least 3 feet from a utility easement.
I bought this house in February 1999. There was a 10×12 foot shed in the back yard which was even at that time clearly deteriorating. Fast forwarding to 2015 and it had become a house for homeless rodents. The door had disintegrated and part of the floor had rotted away. I do need the storage space so I am rebuilding the underlying structure and will be replacing some of the rotted T1-11 siding on the front.
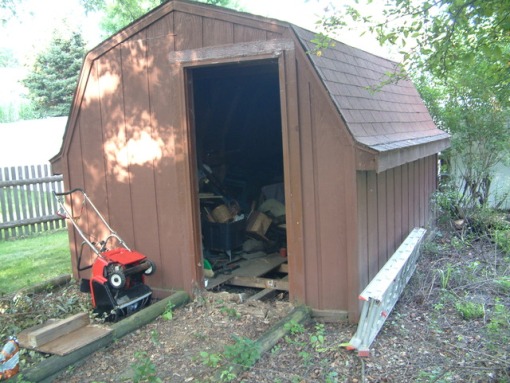
This is the patient. Note there is no transom or sill under the doorway. The front of the shed faces West and is just set on the dirt following the grade of the lot. It definitely tilts towards the back where there is a drainage swale. My measurements estimate the front is four inches higher than the rear. I believe this was a major factor in the floor deteriorating as rain falling on the door will run into the shed. I will think about raising the rear to make the structure level.
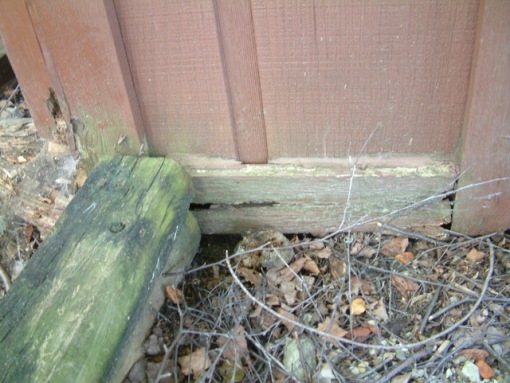
Most of the trim is untreated pine, and the bottom front has been in contact with soil.
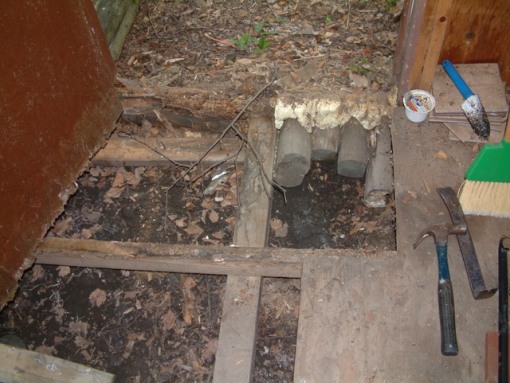
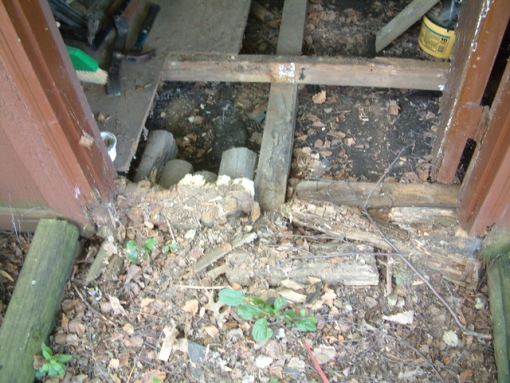
Part of the floor has been removed here and the camera is inside looking at the area underneath the door. Some timber and Great Stuff there in an attempt to keep the rabbits out. The floor is 5/8 plywood and was nailed down with ten penny spikes about every 15 inches. Not fun to get up but I want to put it back down if possible after the framing is repaired.
Transom area from the outside. This would be looking east.
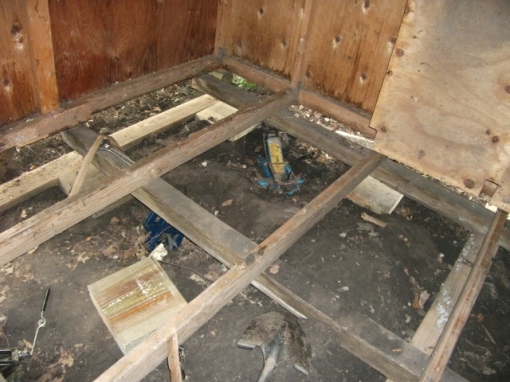
On the south side the floor has been taken up to see what structure is underneath. The shed proper is made of a set of prefabricated barn shaped 2×4 trusses. They are supported by four 4×4 timbers running east to west on a two foot spacing. I discovered that these 4x4s are in turn supported by three 4x4s running north-south set into the dirt.
Four two foot spaced 4×4 across a ten foot shed leaves a foot extra on each side
The plywood flooring has rotted in the area around the door. It has been replaced in pieces at least once.
The first phase was to shore up and replace the sill under the front. Here the front of the shed has been jacked up about four inches. I obtained several two foot long 12×3″ treated cutoffs from a forest preserve project a few miles from here. Getting them home on a bicycle was interesting. My original plan was to use the cutoffs as pads underneath the 4×4 sub structure. In this photo there is a pad under each of the four members at the front. I have a number of treated 2×6 timbers removed from a deck and I decided to put one 2×6 on top of each of the lateral 4x4s. This will raise the entire structure an inch and a half, getting it above the dirt. I hope.
This bumper jack is raising the southwest corner. Big jack, must have been from a Buick. It will pull a fence post no problem.
I’m cutting the 2 foot pads in half which gives a piece about 11×12″ and you can see the pad in the corner.
I have one hydraulic floor jack, and a half dozen scissors jacks accumulated in anticipation of this project. The procedure is to dig a hole, slide the jack under a support beam and turn the cranks evenly. The floor jack worked the easiest, and the bumper jack not too difficult with the load but the scissor jacks were hard to turn their screw while the jack is in a hole. A big crescent wrench helped.
I’m also putting a pair of support pads under each side because I noticed the shed has sagged a bit in the middle.
This photo shows the north side of the shed. Another scissors jack is helping raise the center of the structure and the front is now elevated. Pads have been placed at the front corner (left of photo) and at two spaces under the side 4×4″. You can see a 2×6 has been slid over the front lateral and also over the lateral in the center. The barn shaped trusses are on 24 inch centers.
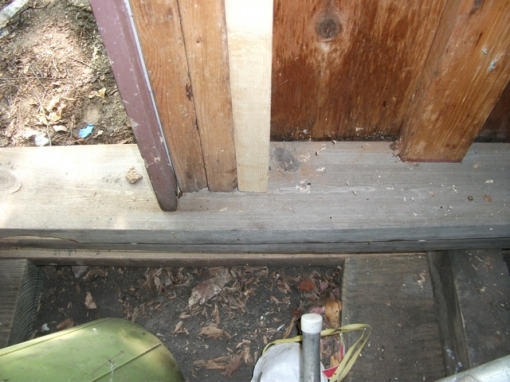
The horizontal part of the bottom front truss 2×4 that formerly formed the bottom of the door frame was gone. Rather than replace it with another 2×4, I laminated a pair of 2x6s with a bit of half inch plywood to make a beam the same thickness. The vertical studs that formed the door frame are rotted at the bottom, they will be replaced when I find a suitable door.
This is the southwest front corner after raising and placing the treated lumber pad, and installing a new beam across the front. I have screwed a short piece of 2×4 to the rotted door frame to hold it together temporarily.
This is the north side of the door frame with a good 2×4 added.
At this point the front had been repaired enough that I could begin at the back of the shed. The remainder of the floor was removed, the jacks moved to the back. I decided to add another three inches under the rearmost beam to make the structure more level. This is the final arrangement at the north east corner. Three 2×6 under the side beams and two of the 3 inch pads to help take the load. I put a long lag bolt all the way through the 2×6 to tie the structure together.
This is the opposite rear corner.
The two middle 4x4s had to be double padded as well.
Since I had added 3×12 pads at two points along each side, raising the rear an additional three inches required adding some additional wood to take up the space at those points. One inch ripped from a 4×4 above the pad at the left in this photo and one inch plus a 2×6 at the right. The center lateral beam just needed one more 2×6 to make it come out even. The center was bolted down as well.
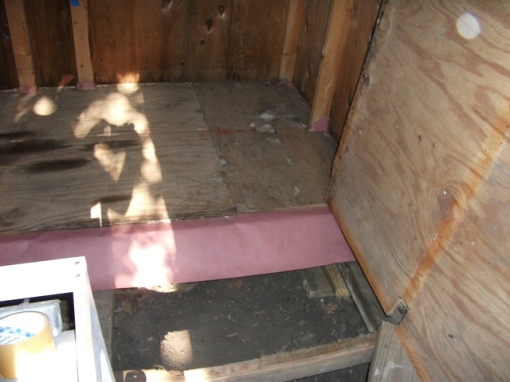
Now the structural repair was complete and I could start putting the plywood floor back down. It’s splintered a bit from digging out the nails but in a shed, I don’t care, I spackled the splinters. I’m screwing everything together so it can be taken up easily at some future time. I put down a layer of rosin paper. Don’t know if that’s necessary but I had some so I used it.
This photo is the north side corner at the rear.
This photo is the south corner at the rear. I also squirted Great Stuff in all the spaces around where the trusses were cut out.
To Do as of 8/7: Finish re-laying the floor and plan to patch the damaged part. Find an exterior door! Get a sheet of T1-11. Get a sheet of 5/8 ply to patch the floor. Get 1×4 cedar to frame the door. Figure out how to get those home. Add soffit vent screens and a screened vent at the rear near peak.
Update: Week of August 10-14
The flooring is all back in place except a 2′ x 6′ piece behind the door which was too badly rotted to reuse.
Added four soffit vents and a 14 inch square gable vent at the top rear. Made a nice cedar frame for the gable vent.
I rented a pickup truck from Menards ($19 for 75 minutes, made it with 15 minutes to spare) and hauled the following things home:
Sheet of 5/8 exterior plywood
Sheet of T1-11 siding
Three 8 foot 1x6s
Three 7 foot 2x4s
And while I had the truck, a used exterior door from the Habitat Resale store.
So now I have no excuse for not finishing the project.
I am not very confident with the door, have to make a frame to fit it. After some drawing and math involving ugly fractions I had a plan for the frame.
The old frame is 4 1/2 inches thick. Probably made to account for a 2×4 stud wall and a half inch of wall board on either side. I only have the stud wall to account for so have downsized the proposed frame to 3 1/2 inches wide. I bought three 2x6s to form the frame so I moved my table saw to the summer workshop (driveway) and ripped them down. Two of the waste strips were then ripped to 3/8″ thickness, one to half inch. These will form the stop moldings . Here is the ripping work station. I use my plug in router table as an outfeed support. It plugs into channels on either side of the saw table.
I blocked up the door on a couple of saw horses and clamped the stop molding and frame members to the sides to get an idea of what to do next. It looked good but how to align the hinges?
The door formerly had hinges with four screw holes. Could not find hinges that matched the hole pattern though so I moved the hinges up a half inch so there was solid wood for new screws. I decided to cut the hinges into the frame member first. I aligned them to the board edge and knifed in the hinge outline. Used a one inch chisel to further deepen the hinge outline and a small gouge to round the corners. Then wasted most of the pocket with a trim router, followed by a pass with my good old Stanley 71 router plane to clean up the edges. Hinges fit well. Now to fasten the other hinge leaves to the door.
I set the frame with hinges attached on the door. With a 3/4″ board under each one it looked like the alignment on the door was as good as it could be. Piloted the screws with a Vix bit.
This shows one of the hinges hanging over the door edge ready to be piloted and screwed down. After running four screws in each hinge on the door side, I removed the clamps and, Moment of Truth, found the frame pivoted all the way with no binding whatsoever. Success!
The final bit of engineering was to bridge the top of the frame. After studying the existing frame, I decided to capture this horizontal board in shallow Dados. I laid them out in pencil, cut the sides down a quarter inch with a back saw then hogged out most of the waste with a chisel. Cleaned the bottom of the dado with the Stanley 71 router plane. This is the Christopher Schwarz/ Roy Underhill method and was probably faster than setting up a jig for the little Dewalt router.
This photo shows the dado with header board inserted, glued and screwed.
Finally I screwed a temporary header across the bottom of the frame, punched out the hinge pins and removed the door. Two temporary diagonal braces were screwed on so the frame can be safely moved. Both the door and the frame are on the back yard deck now with a coat of paint drying. I think it will work, will find out Monday when the install is done.
Update August 18
Howard Peterson, from the Dupage Woodworkers Club came over to help with the door. Howard is active with Habitat for Humanity and has much experience building houses. In four hours we had the door installed and the missing piece of flooring replaced.
After tearing out the old frame and the 2x4s that supported it, a framing square showed the opening was far from square, and the floor was not level. Howard ripped tapered shims from 2x4s to correct the out of square condition. Look closely at the vertical edges in the next photo, you can see the tapered bits. I would never have though of doing this, thanks Howard!
After considerable fussing, the door fit well, and we cut a new piece to replace the open floor behind the door. The inside of the shed is now secure and usable.
Update August 23
Next step was to replace the rotted and ant infested sections of T1-11 siding on the front. I figured I could do this with a single sheet of siding if only the bad parts were re done so ran a horizontal chalk line two feet up from the bottom and sliced off the old material with a circular saw. New sections were cut and fitted. I decided to run the new lower piece down almost to the footing to fill the open gap there and in doing so, almost ran out of the new sheet. The lower right piece was short but it turned out the pattern didn’t line up anyway so I made a five inch filler piece and it’s hardly visible.
All the new sections are fastened with screws and I put aluminum drip edge strips in the horizontal seams to keep rain out of the joint.
And here is the repaired front side with one coat of oil stain. Later another coat of stain was done on the entire shed. Had to caulk a number of carpenter bee holes in the left hand soffit.
The final step was to replace the edge and door trim on the front. I had to rent the Menards truck again to bring home the half dozen cedar boards I figured would be needed. I’m using six inch cedar trim around the door rather than brick molding plus four inch that was on the old door.
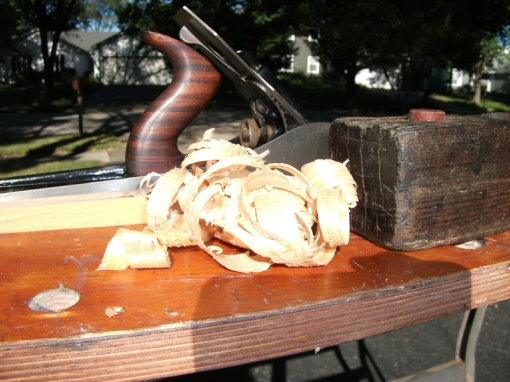
Cedar was cut and fitted for door stop moldings at this time. This was complicated by the fact that there was a 3/4 inch warp in the front wall which cause the top left corner of the door frame to stick out farther than the right side. I couldn’t use the stop moldings I had previously made, had to make tapered stop strips out of cedar to account for the bulge. It was a chance to use my latest secret weapon, a crude scrub plane I made out of a decrepit wooden jack plane. The blade has been ground to a radius of 8 inches so the plane takes a deep narrow cut. It hogged off the extra wood down to the line in about five minutes and I shot the edge with a long jointer plane.
My scrub plane takes out these thick rough shavings. Doesn’t take many passes to remove a half inch of cedar.
All the trim and stop is in place in this picture. I installed an aluminum threshold piece which will help shed water out the front instead of running back into the shed floor.
A major benefit of using deck screws instead of nails is you can take the project apart for painting. I painted the trim a lighter color to match the house, would have gone crazy cutting in two coats of paint around all that cedar. Here is all that carefully fitted wood painted and drying on saw horses.
Update August 25
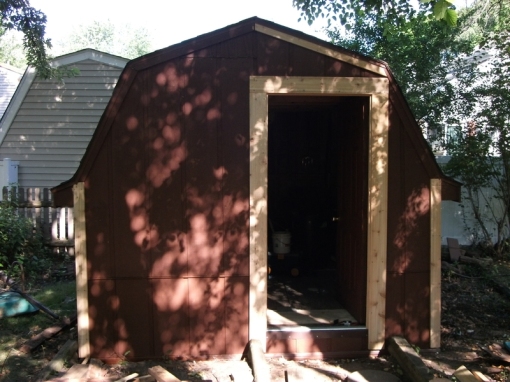
And this is the completed, painted restoration. Just need to add some weather stripping around the door and caulk a few gaps under the eves.
I’ve been fussing inside the shed all day. It’s an interesting problem, how to best make use of a 10×12 foot space. Formerly, stuff was just piled on the floor, so usually had to crawl over some things to get to what I needed. I’m now hanging as much as I can from the back and front walls and stashing spare wood scraps in the rafters so the floor space is clear.
Final Update September 4
Thinking more about efficient utilization of the interior space, I realized that adding shelving would help. The cheapest 18 inch commercial product I found was at Meijers, $25 for a four shelf unit 4 feet high. The home centers had similar units starting at $45. I decided I could build something better. There were 2x4s nailed across the inside of the shed on both sides with a single nail in each stud, I believe these originally supported the frames while the T1-11 siding and roof was nailed on. So I tore those 2x4s down, ripped them lengthwise to make 2 by 2s and converted them into shelves on each side of the shed. Also I had 3/8 plywood available that my neighbor surplused after a sump pump failure which I cut in around the studs. Would not have been able to do that with commercial metal shelving.

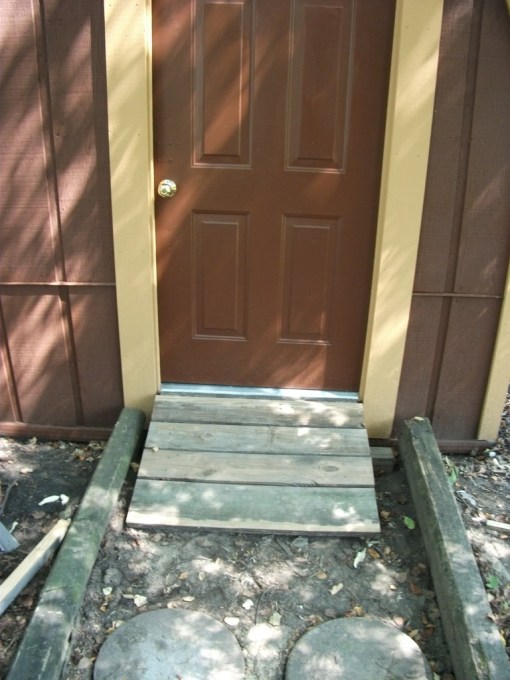
The final touch was to build a ramp leading up to the now higher threshold. I had 2×6 treated boards left over from rebuilding a planter years ago. It took a bit of fussing to get the ramp stable but I can easily wheel the lawn mower in there now which will clear space in the garage.
The structure is considered finished now, though there will always be changes to my storage strategy. I hope it lasts another 20 years.
